Today I'm sharing how I make my cotton drawstring reversible washable shoe bags! (or leotard bags, or whatever bags). This is an easy sewing tutorial and is great for helping younger dancers stay organized!
Not in the mood to make your own? I am working on making several to sell in the shop!
Thanks for visiting! Just so you know, my blog contains affiliate links, which generate commission for me off your purchase. All reviews are 100% my own opinion. Any item featured may have been received free in exchange for promotion or review, but does not in any way affect my review.
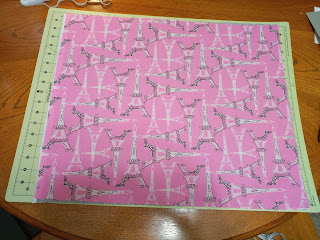
Step 1 - Lay out your fabric. You'll need 2 pieces the same size. I like using fat quarters because *prints*. Tip: line up the salvage, but don't cut it off. You can use it for the top seam because it'll be enclosed.
Step 2 - Fold the fabric in half with the fold on the BOTTOM and cut to the desired size.
Step 3 - sewing the right (pretty) sides together, make 2 bags (again, fold on the bottom. It just looks prettier that way.)
(I forgot to take a picture of the pink version. I got so excited. Here is the two finished bags in the batman smaller bag.)
Step 4 - Put one bag inside the other, with the good sides facing. (You'll have to turn one bag inside out, and leave the other as is.)
Step 5: Sew the bags together at the top (along the salvage edge, if you left it there) all the way around except about 3 inches (this is how you'll turn it inside out).
Step 6 - turn inside out! This is also a good time to press the fabric with a warm iron.
Step 7 - Push one end into the other end. Now you have the beginnings of the lined reversible bag.
Step 8 - You can do this now, or later, but I find it's easier to do it now! Thread the drawstring or ribbon into the bag. Use your fingers to pull the ribbon to the top of the bag, and use a pin to keep it near the top. (You don't want to accidentally sew through it in the next step.)
Step 9 - Sew through both layers around the top of the bag to create the drawstring case. Do you see my seam?
Step 10 - using an invisible stitch, sew the last 3 open inches together. You can get it pretty close to all the way closed!
This stitch is tricky at first, but I used yellow thread so you can see.
Go into the fabric, along the inside.
Go out of the fabric, "right across the street."
Go along the inside of the fabric, and back across the street.
Boom! drawstring bag. Perfect for tights, undies, ballet shoes, etc.
Variation - for younger students, use elastic instead of a drawstring, and close the case at the top completely. Just stretch the bag to open, no strings to worry about!
Enjoy! And show me your finished projects!


0 comments